Controlling the real robot
You can control Robotont using either your keyboard, a gamepad or a web-based interface. This section explains how to send movement commands to the robot and interact using both methods.
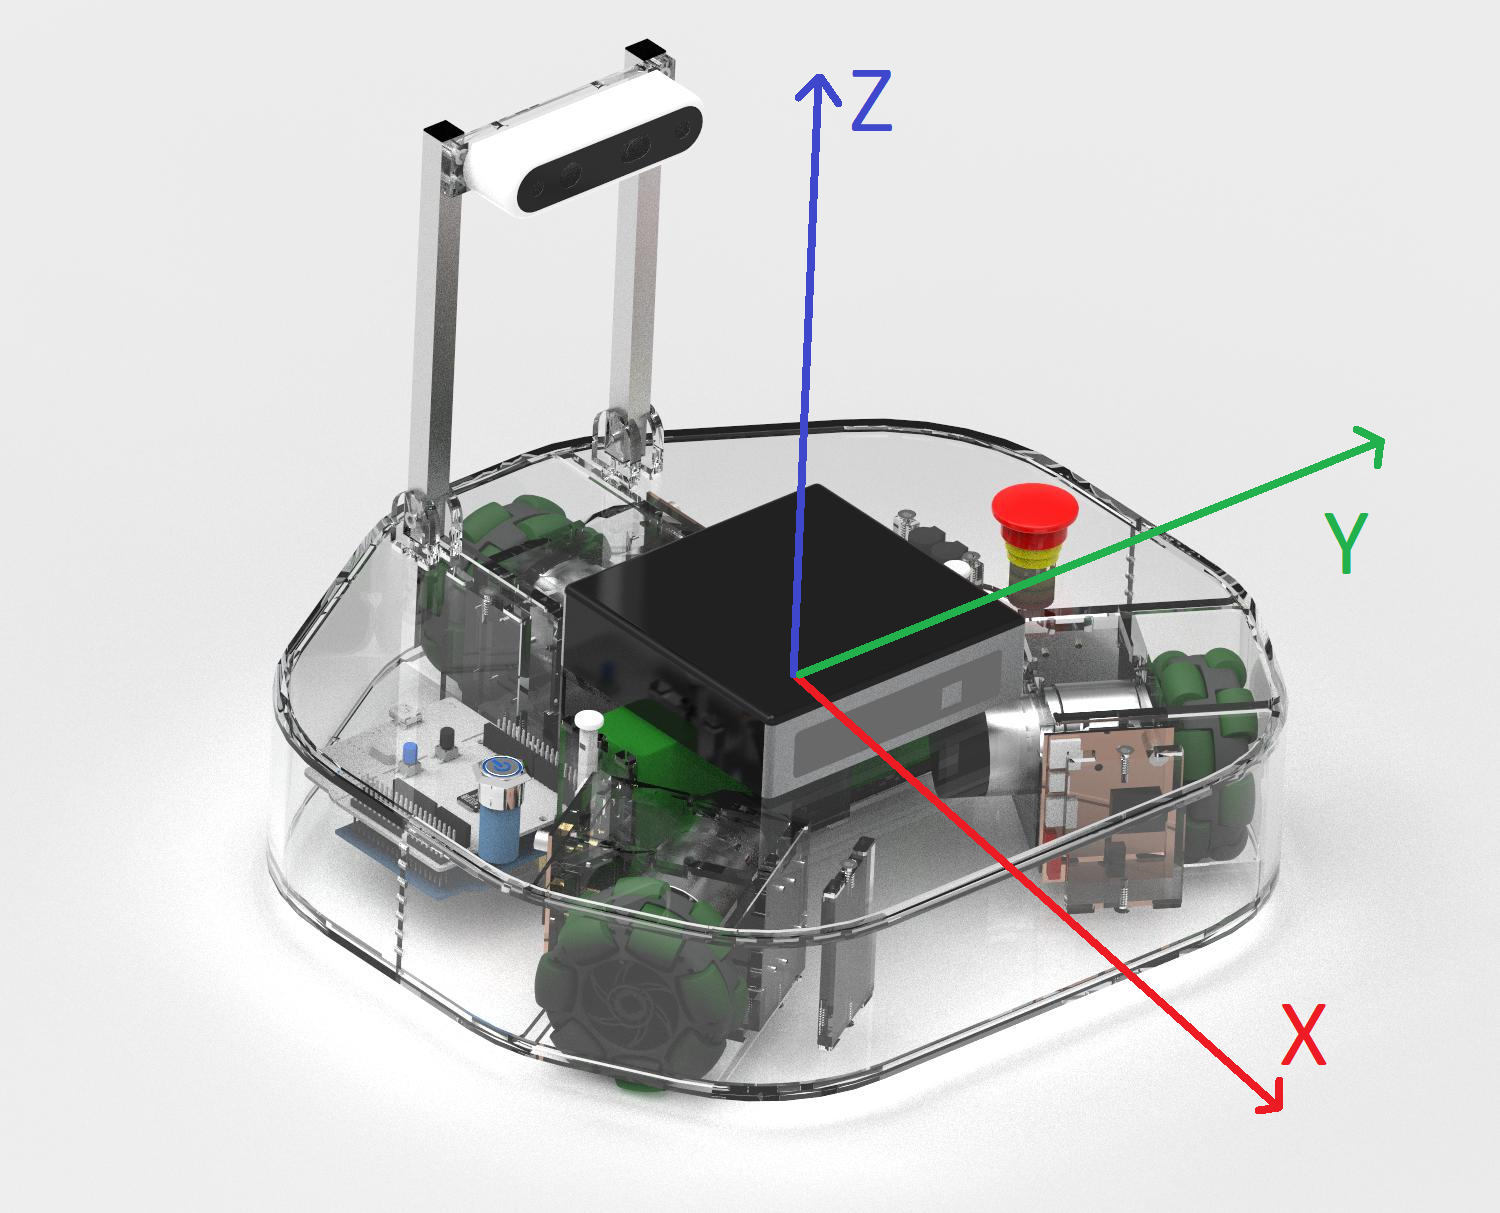
The robot driver subscribes to a specific type of messages called velocity commands. The standard name for this topic is
/cmd_vel.The message is of type
geometry_msgs/Twist— see its structure on the ROS 2 geometry_msgs/Twist documentation.To set and control the robot speed, the velocity commands need to be published continuously.
Controlling the robot using teleop twist keyboard
Setup
Hint
Before installing any packages from apt, make sure existing packages are up-to-date:
sudo apt update && sudo apt upgrade -y
Hint
ROS packages installed from apt are only available in terminals where the ROS environment has been sourced. To use these packages, you must first source the general ROS 2 environment:
source /opt/ros/jazzy/setup.bash
Install teleop twist keyboard from apt:
sudo apt install ros-jazzy-teleop-twist-keyboard
(Optional) Connect the robot and PC with the same subnet (see Distributed ROS 2).
Controlling the robot
In Terminal (on the robot’s on-board computer or another PC, if distributed ROS is set up):
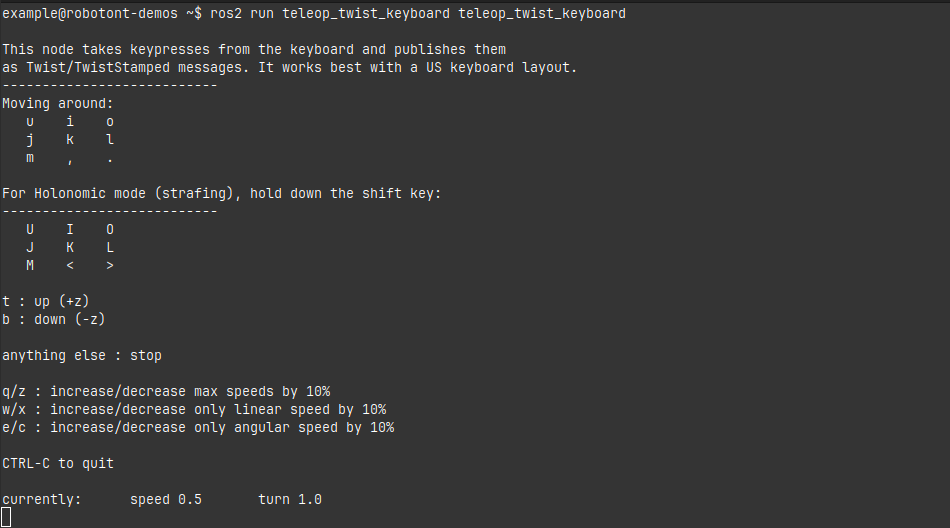
ros2 run teleop_twist_keyboard teleop_twist_keyboard
Use the following keys to move the robot:
Warning
From this point beyond, you are able to drive the robot with a keyboard. Should you lose control over the robot, do one of the following:
Press “k” to stop the robot
Press the emergency stop button on the robot
Hint
Note that teleop only receives keypresses when the terminal window is active (in focus).
Tip
Use
CTRL + Cto stop the node.
Controlling the robot using a gamepad
Setup
Connecting a controller
Hint
Before installing any packages from apt, make sure existing packages are up-to-date:
sudo apt update && sudo apt upgrade -y
Install
bluetooth,bluezandbluez-toolsfrom aptsudo apt install bluetooth bluez bluez-tools
Put your controller into pairing mode
Note
demo_teleoppackage includes the configuration file for DualSense® controller.To put the DualSense controller into pairing mode:
Hold the PS button and the Create button down for a few seconds
The light bar will start rapidly flashing blue, which indicates, that the controller is in pairing mode
In Terminal, start the Bluetooth CLI tool:
bluetoothctl
Turn on the Bluetooth agent and scanning:
power on
agent on
scan on
Wait for your controller to appear
Note
It should look something like:
Device XX:XX:XX:XX:XX:XX Wireless ControllerPair and connect the controller:
Replace
XX:XX:XX:XX:XX:XXwith your controller’s MAC address:pair XX:XX:XX:XX:XX:XX connect XX:XX:XX:XX:XX:XX trust XX:XX:XX:XX:XX:XX
Stop scanning and exit the tool:
scan off
exit
Dependencies
Hint
ROS packages installed from apt are only available in terminals where the ROS environment has been sourced. To use these packages, you must first source the general ROS 2 environment:
source /opt/ros/jazzy/setup.bash
Install
joyfrom apt:sudo apt install ros-jazzy-joy
Navigate to your colcon workspace:
cd ~/<your_colcon_workspace>/src
Clone the
demo_teleoppackage:git clone https://github.com/robotont-demos/demo_teleop.git
Build the package:
colcon build --packages-select demo_teleop
(Optional) Connect the robot and PC with the same subnet (see Distributed ROS 2).
Controlling the robot
In Terminal (on the robot’s on-board computer or another PC, if distributed ROS is set up):
ros2 launch demo_teleop teleop_joy.launch.py
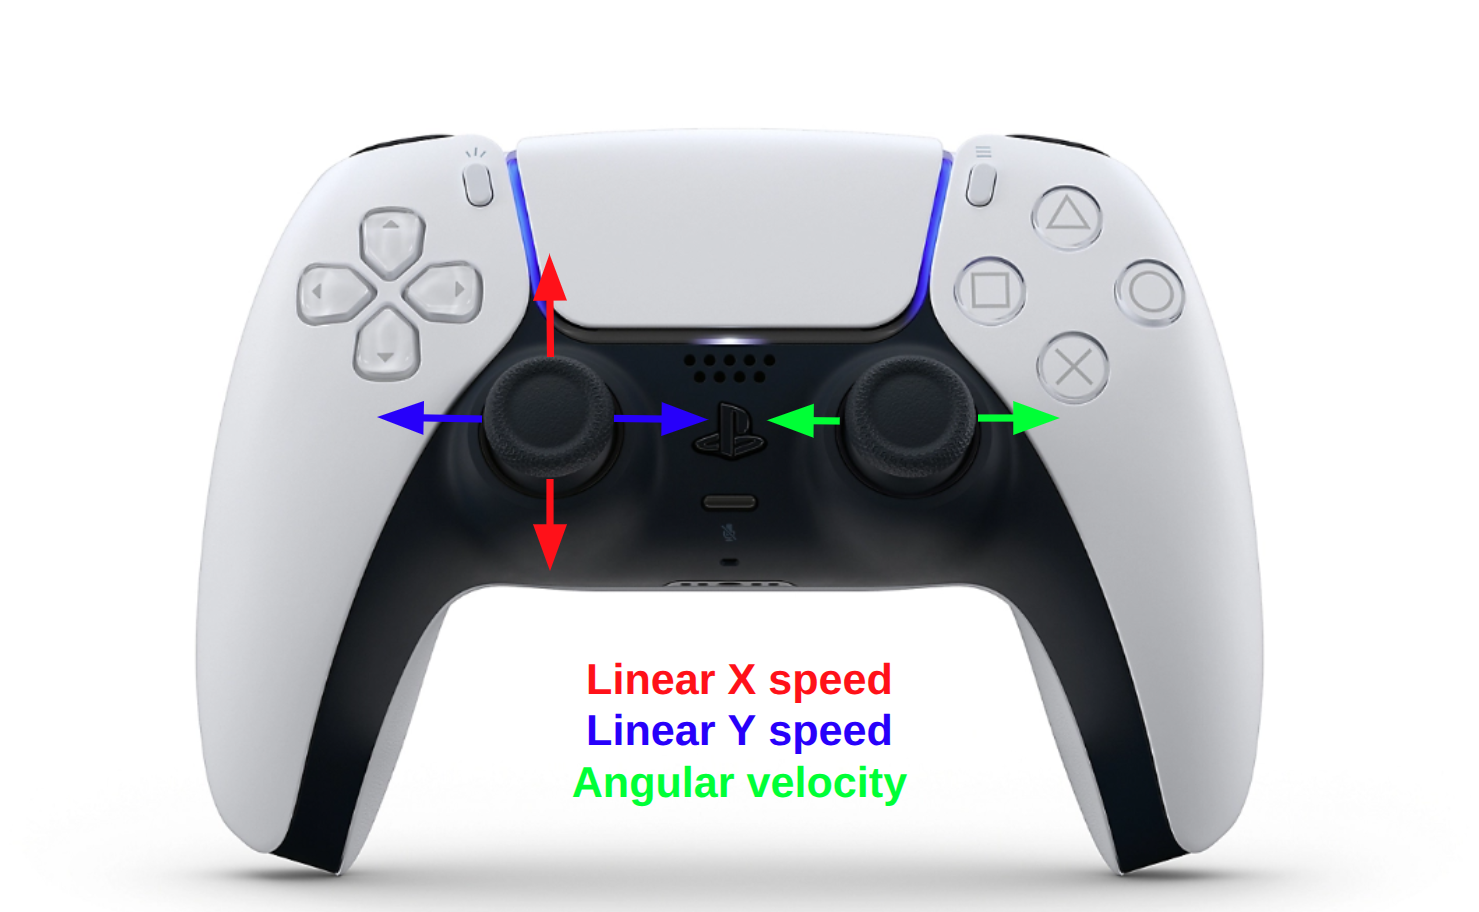
The robot can be controlled using the joysticks:
Warning
From this point beyond, you are able to drive the robot with a controller. Should you lose control over the robot, do one of the following:
Use
CTRL + Cto stop the node.Press the emergency stop button on the robot
Controlling the robot using a web interface
Important
Make sure that the user’s device and the robot are connected to the same subnet and are visible to one another (see Verifying Communication).
Open the following URL in your web browser (replace <ip-of-the-robot> with the actual IP address of your robot):
http://<ip-of-the-robot>:3000/
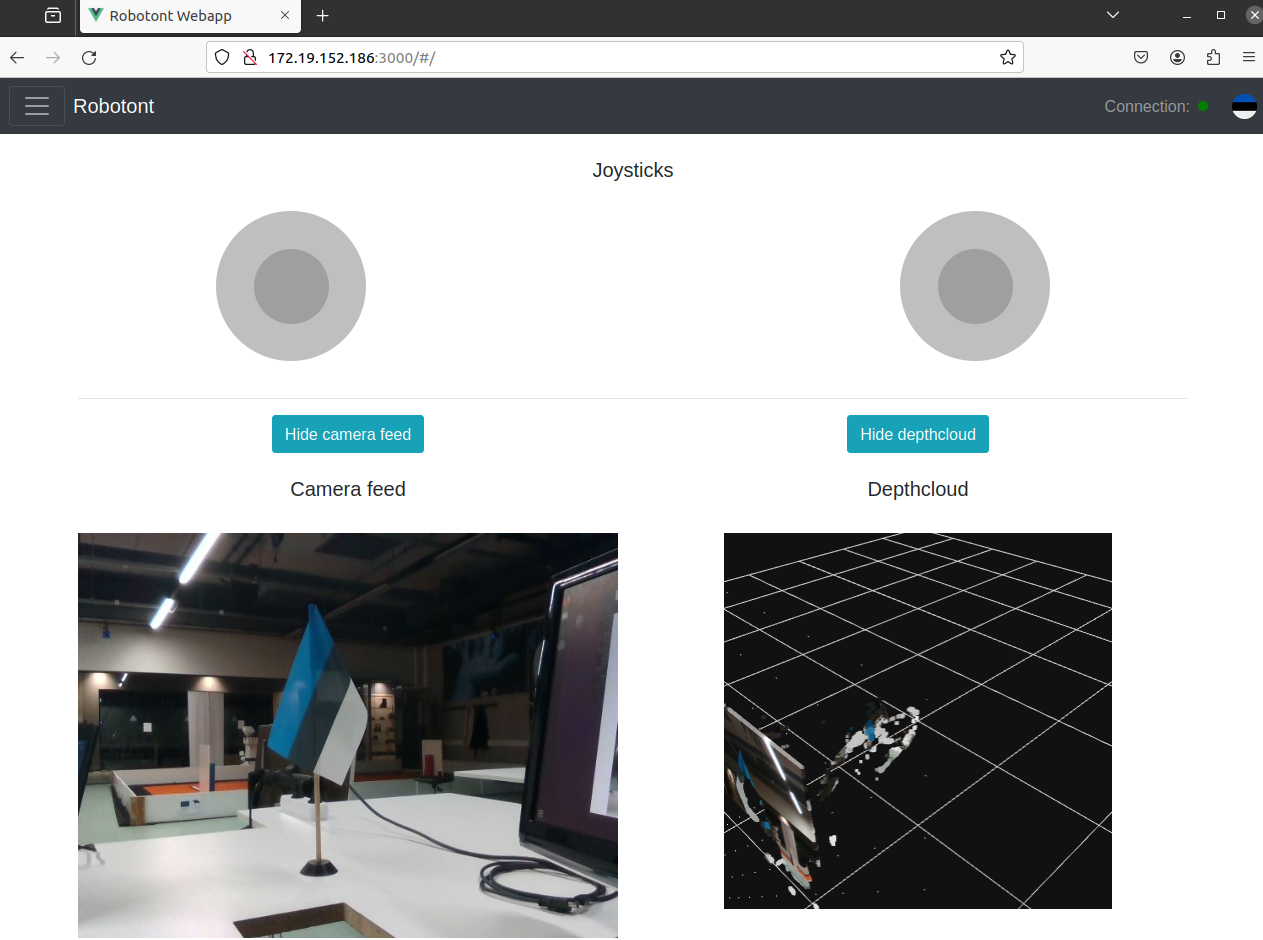
You should see the following page:
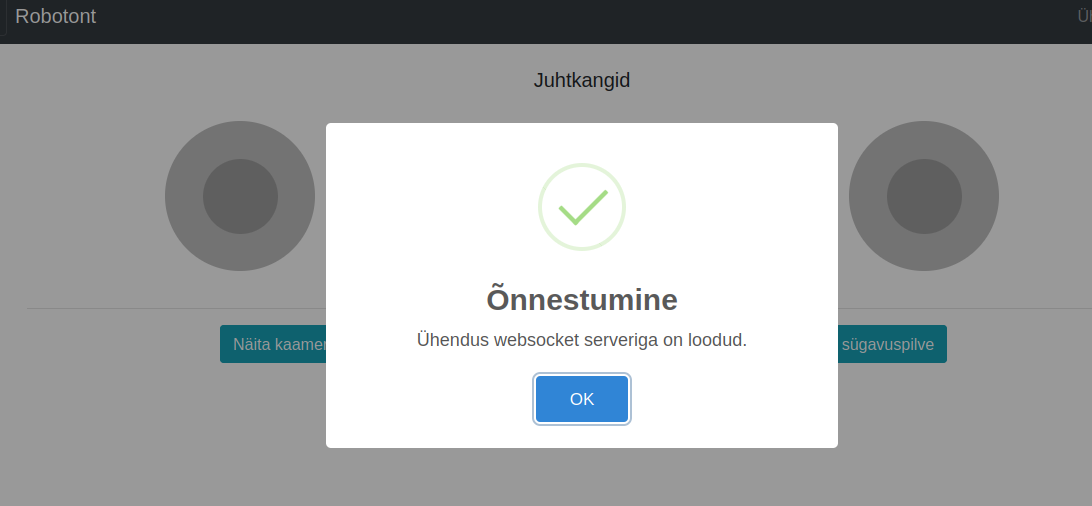
Click OK to close the connection status dialog
You can now control the robot using the on-screen joystick and view both the camera feed and depth cloud in your browser.