Connecting to the Robot
This setup tutorial will guide you through connecting your PC to use it with Robotont.
Setting up the PC
Make sure you check: Prerequisites.
Building the colcon workspace
cd colcon_ws
colcon build
Sourcing the workspace
Make the workspace visible to ROS 2 (must be done for every new Terminal session)
source ~/colcon_ws/install/setup.bash
For automatic sourcing:
echo "source ~/colcon_ws/install/setup.bash" >> ~/.bashrc
Network Setup
In order to work with Robotont one of the most convenient ways is to build a network connection between the robot and your PC.
There are different ways in which you can connect to the robot remotely.
AP connection
Client connection
AP connection
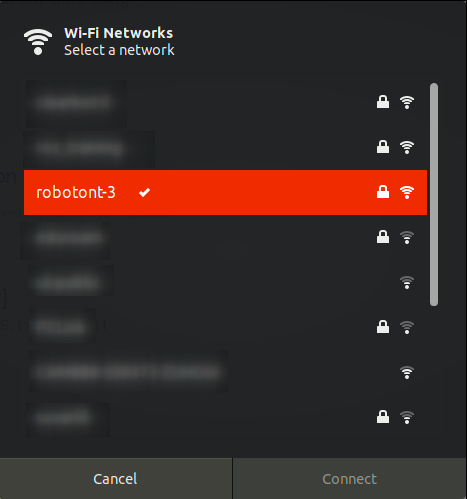
Access Point (AP) connection involves connecting directly to the robotont’s own network.
This method allows for direct communication with the robot without needing an external network infrastructure and is the easiest way to connect.
The topology of the network can be seen in the following image:
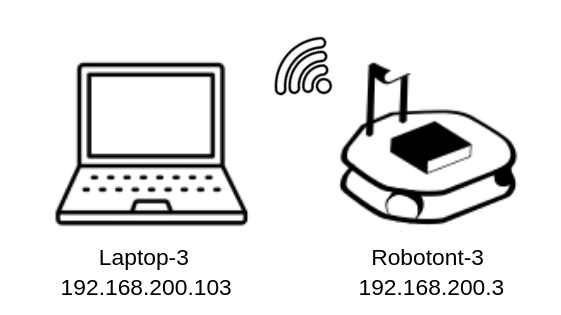
You can achieve this by connecting the user PC to Robotont’s network.
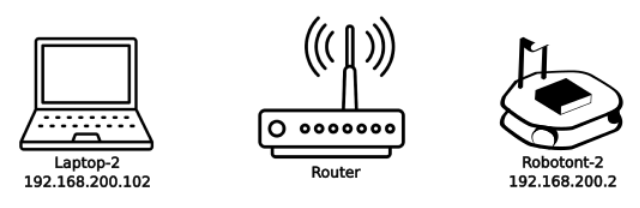
Client connection
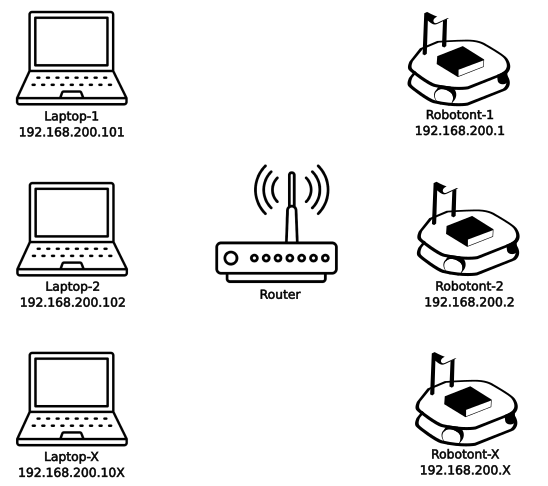
This method involves connecting the robot and the user PC to the same network. The user PC can then connect to the robot using the robot’s IP address or hostname.
This approach can be used to have multiple Robotonts and PCs within the same network. That is particularly helpful when setting up a classroom with multiple Robotonts.
Distributed ROS 2
ROS 2 is designed for distributed systems out of the box. Unlike ROS, it does not use a central ROS Master. Instead, nodes discover each other using DDS.
There are two options for setting up a distributed system, either using static IPs or defining hostnames on each of the devices.
Note
For consistent networking, assign static IP addresses or use DHCP reservation for both the robot and your PC
Verifying Communication
On the Robotont, start a ROS 2 publisher:
ros2 run demo_nodes_cpp talker
On the PC, start a ROS 2 subscriber:
ros2 run demo_nodes_cpp listener
If setup correctly, the PC should receive messages from the Robotont.
SSH
SSH provides a safe and reliable way to remotely connect to the robot, allowing you to check its status and execute commands from your PC.
You can connect to the robot using either its IP address or hostname (if defined in the source machine’s /etc/hosts file).
Follow these steps:
Open a new Terminal window on your PC
Connect your PC to Robotont’s network
Start the SSH connection using either the robot’s hostname or IP address:
If prompted with a “yes/no” question about authenticity, type
yesand press Enter.Enter the password when prompted
Verify the login:
When logged in, the terminal prompt will change to
peko@robotont-X(or similar), indicating you are connected to the robot. This helps you identify which terminal is connected remotely.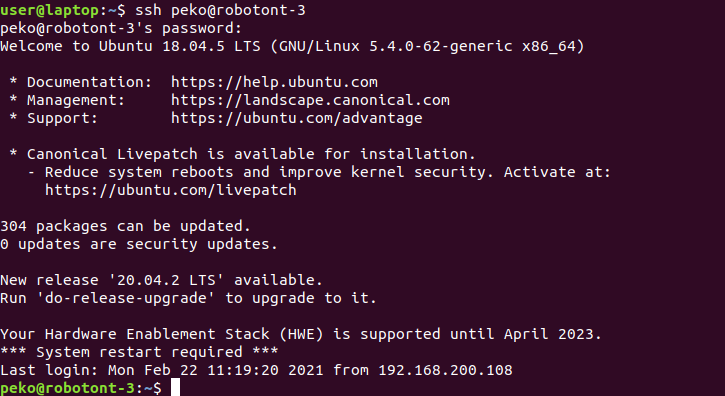
ROS environment setup:
The robot should automatically source its ROS environment on login. To check which workspaces are being sourced, you can run:
tail ~/.bashrc
Tip
If you have connection issues, double-check the robot’s network settings and ensure you are using the correct hostname or IP address
Troubleshooting Tips
Make sure both devices are on the same network/subnet.
Check that firewalls allow multicast UDP traffic.
Use the same
ROS_DOMAIN_IDon all machines.If communication issues persist:
Try a different DDS implementation (e.g., Cyclone DDS or Fast DDS).
Explicitly set the middleware with:
export RMW_IMPLEMENTATION=rmw_cyclonedds_cpp