Demos on Gazebo
Before running the demos it is necessary to get acquainted with the setup section of the documentation. Make sure you check: Prerequisites.
You can find the demos from the following repositories:
Launching the Simulation
Make sure you have already set up the simulation following the steps described in Gazebo Simulator.
2D Mapping and Localization
Setup
Hint
Before installing any packages from apt, make sure existing packages are up-to-date:
sudo apt update && sudo apt upgrade -y
Hint
ROS packages installed from apt are only available in terminals where the ROS environment has been sourced. To use these packages, you must first source the general ROS 2 environment:
source /opt/ros/jazzy/setup.bash
Install Nav2 from apt:
sudo apt install ros-jazzy-navigation2
Navigate to your colcon workspace
cd ~/<your_colcon_workspace>/src
Clone the
depthimage_to_laserscanpackagegit clone https://github.com/ros-perception/depthimage_to_laserscan.git --branch ros2
Build the package:
colcon build --packages-select depthimage_to_laserscan
The demo for 2D slam based navigation is available from this repository.
Navigate to your colcon workspace
cd ~/<your_colcon_workspace>/src
Clone the
2d_slampackagegit clone https://github.com/robotont-demos/2d_slam.git
Build the package:
colcon build --packages-select 2d_slam
Running the demo
The demo can be run on a Robotont featuring either a LIDAR or the standard Realsense D435i camera
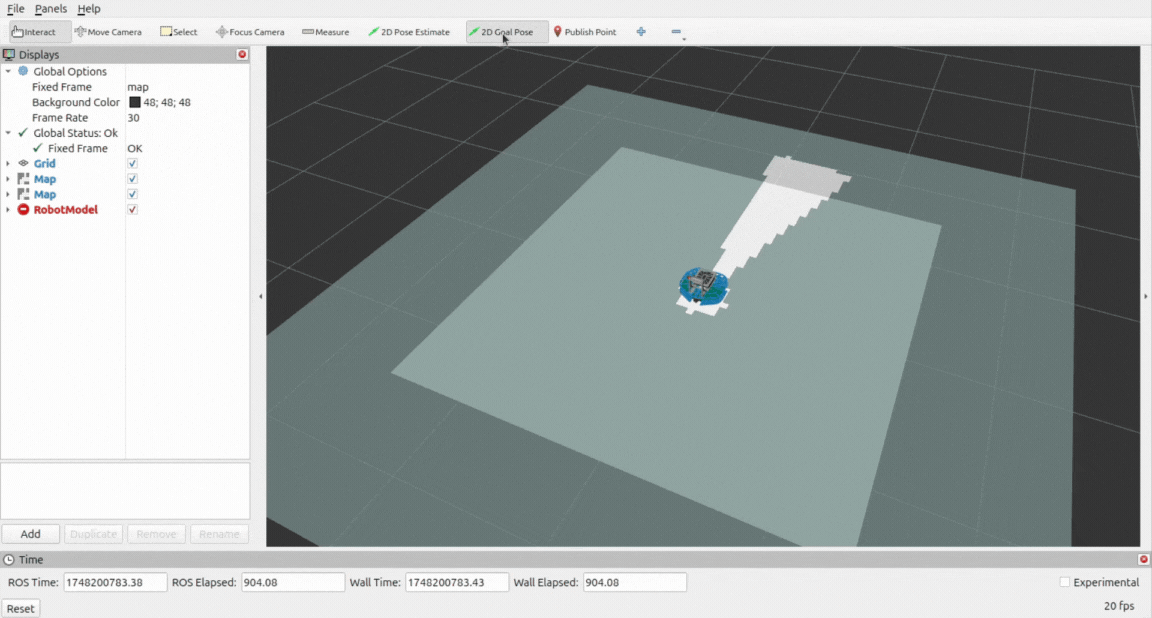
Setting 2D navigation goals
Using ROS Navigation to make the robot move autonomously is straightforward. In RViz, you have two main GUI buttons: one to set the robot’s current location (if it doesn’t localize itself accurately at startup), and one to set its navigation goal.
To set the initial pose:
Click on “2D Pose Estimate” in the RViz toolbar, then click and drag the arrow to indicate where the robot is located and which way it is facing.

To set a navigation goal:
Click on “2D Goal Pose” in the RViz toolbar, then click and drag the arrow to the desired destination and orientation for the robot.
3D mapping
Creates a 3D map of the robot’s surroundings.

Follow the leader
The follow the leader demo shows the capabilities of the Robotont platform to detect and follow the AR Tag.
AR steering
The AR steering demo shows the capabilities of the Robotont platform to detect and follow the AR Tag.
AR maze
The AR maze demo shows the capabilities of the Robotont platform to detect and follow the AR Tag.